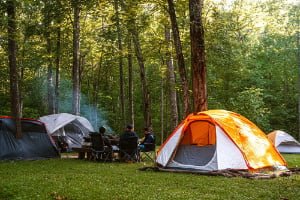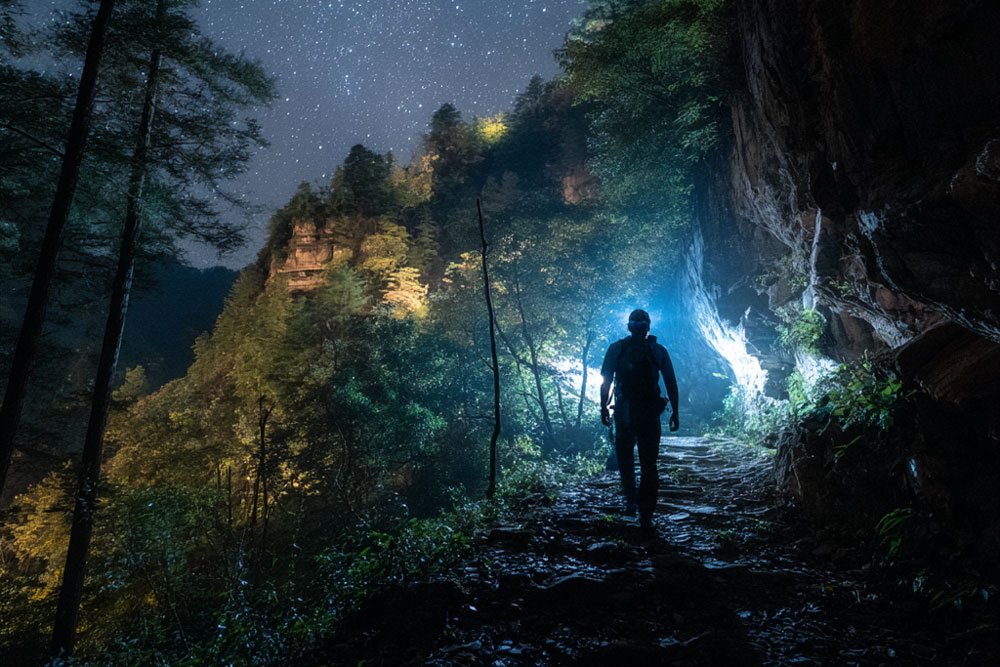
Do you feel unsafe walking on dark trails? A sudden loss of light can ruin your trip. I will show you how to pick the perfect headlamp for night hikes.
A good headlamp for night hiking needs a stable brightness of 200 to 400 lumens, a mix of flood and spot beams, and at least 4 hours of battery life. It must also have an IPX4 waterproof rating, a comfortable headband, and a dedicated red light mode for safety.
Choosing the right headlamp is actually simple. You just need enough light, stable battery power, good water resistance, and high visibility1. I have worked in the portable lighting industry for years. I listen to feedback from big retail buyers and outdoor brands every day. I will share my practical advice with you below. You do not want to buy the wrong gear and get stuck in the dark. Let us look at the details.
Optimal Brightness Levels: How Many Lumens Do You Really Need?
Are you confused by high lumen numbers? Buying a headlamp that is too bright drains your battery fast. You only need a specific lumen range for safe night hiking.
You really only need 200 to 400 lumens for most night hiking situations. This range provides clear vision without wasting battery power. You should look for stable, continuous brightness instead of focusing only on the highest maximum output.

Many people think brighter is always better. This is a common mistake. I see many buyers ask for 1000 lumens. I always tell them this is unnecessary for walking on a trail. You use a very high brightness mode. Then the battery dies very quickly. The light output also drops fast. This happens because the LED gets too hot. Night hiking requires a steady light. You must choose a headlamp that keeps a steady light level.
If your headlamp is under 200 lumens, you cannot see obstacles clearly. You might trip over a rock. If it is over 400 lumens, the light reflects off trees. This bright reflection hurts your eyes. The 200 to 400 lumen range is the best. It represents the most stable hardware technology in headlamps today. Do not buy a product just because it has a high maximum number on the box. A steady 300 lumens is much better than a headlamp that hits 1000 lumens for one minute and then drops to 100 lumens.
Brightness Comparison Table
| Lumen Range | Best Use Case | Battery Drain Rate | My Recommendation |
|---|---|---|---|
| Under 200 | Reading in a tent | Very Slow | Too dim for trails |
| 200 - 400 | Walking on night trails | Moderate | Highly Recommended |
| Over 400 | Search and rescue | Very Fast | Not practical |
Beam Patterns Explained: Flood vs. Spot for Night Trails?
Do you trip over rocks in the dark? A narrow beam leaves your feet in shadows. You need the right combination of beam patterns to see everything clearly.
The best setup for night hiking is a combination of a flood beam2 and a spot beam3. You use the flood beam2 to see the rough ground near your feet. You use the spot beam3 to see trail signs and distance markers far ahead of you.
 Click here to see details of this headlamp.
You do not always need to see far away when you hike at night. You usually need to see the uneven ground right in front of you. This is why the flood light is actually your main tool. I always advise my clients to test the flood angle. The flood light spreads a wide beam. It lights up roots and rocks. The spot light shoots a narrow beam. It helps you find the right path when you are lost. You need a headlamp that switches between these two modes very quickly.
I also want to point out a special detail. A good headlamp must have a wide adjustable angle for the flood light. For example, at Kovalite, we design our headlamps with large adjustable angles. This helps hikers adapt to changing trail conditions easily. You can point the light exactly where you need it. You do not have to bend your neck all the time. A mixed beam is also great for fast walking.
Beam Pattern Setup Table
| Beam Type | Main Purpose | Distance | Importance for Hiking |
|---|---|---|---|
| Flood Beam | Seeing the ground | Short | Very High |
| Spot Beam | Finding trail markers | Long | Medium |
| Mixed Beam | Fast walking | Medium | High |
Battery Life Essentials: Avoiding Power Anxiety on the Trail?
Are you afraid your light will die in the woods? Running out of power is dangerous. You must choose a headlamp with smart battery options to avoid power anxiety.
You need a headlamp that lasts at least 4 to 6 hours on a medium or high setting. I highly recommend a dual-power design4. This means the headlamp uses a rechargeable battery pack but can also use standard AA or AAA batteries as a backup.

Many people buy a headlamp for its highest brightness. They then use that highest setting on the trail. This drains the battery very fast. It causes the light to shut off in the middle of a hike. This is a very bad situation. You must plan your power needs carefully. You need a headlamp that lasts at least four to six hours on a medium setting.
My best advice is to use a dual-power system. You charge the main battery at home. You carry cheap AAA batteries in your bag. If the main battery dies, you just put the AAA batteries in. You never have to worry about the dark again. Another very practical feature is a battery power indicator. I personally love this feature. A small light tells you how much power is left. It helps you decide when to switch to a lower brightness mode. This simple habit saves a lot of energy.
Battery Type Comparison Table
| Battery Design | Pros | Cons | Best For |
|---|---|---|---|
| Built-in Only | Very light | Cannot swap on trail | Short walks |
| AA/AAA Only | Easy to buy | High cost over time | Emergency kits |
| Dual Power | Ultimate reliability | Slightly heavier | Night hiking |
Comfort and Stability: Choosing a Headband That Stays Put?
Does your headlamp bounce when you walk? A slipping strap causes neck pain and headaches. You need a stable and comfortable headband for a good hiking experience.
A good headband must be wide enough and have a non-slip design5. It should not squeeze your head too tightly during long hikes. It must stay completely still even when you run or walk fast. Comfort is the most easily ignored but crucial factor for night trails.
You might buy the brightest light in the store. But if the strap hurts your head, you will hate wearing it. When you hike, your body moves up and down. A cheap strap will make the light bounce. This bouncing light makes your eyes tired. It can also make you dizzy. You need to look at the fabric of the strap. It must breathe well. It must also have a small silicone line on the inside. This silicone stops the strap from sliding on your hair or your hat.
I always test headbands by wearing them for a full hour. If I feel pressure marks on my forehead, the design is bad. A proper night hiking headlamp feels like a natural part of your head. You should almost forget you are wearing it. The strap must be wide enough to spread the pressure. It must not squeeze your head too tightly. Comfort is truly the most critical factor for a long night hike.
Headband Quality Checklist
| Feature | Why You Need It | Bad Design Example |
|---|---|---|
| Wide Strap | Spreads the pressure | Thin string that cuts skin |
| Silicone Grip | Stops sliding down | Smooth fabric |
| High Elasticity | Fits different heads | Loses shape fast |
Best Color Temperature for Night Hiking: Why Neutral White Wins?
Does your light hurt your eyes in the fog? Cold white light creates a blinding glare. You need the right color temperature to see the trail clearly and comfortably.
I strongly recommend neutral white light6 between 4000K and 5000K for night hiking. Neutral white is softer and does not blind you when it hits fog or wet leaves. It shows the true colors of rocks and dirt, which helps you see trail details much more clearly.

Want to know more about color temperature? Click here to see the details.
Color temperature is a detail that many brands hide. Most cheap headlamps use very cold white LEDs. Cold white looks brighter in a store. But cold white light is terrible for outdoor use. It bounces back from mist and hurts your eyes. Warm light is comfortable. But it does not shine far enough into the dark woods.
Neutral white sits right in the middle. It mimics natural sunlight. When you use neutral white, a brown branch looks brown. It does not look grey. This helps your brain recognize tripping hazards much faster. Many headlamps now have different color modes. I suggest you check the box. You need to see if neutral white is an option. If you can only choose one color, neutral white is always the safest choice. It is the most effective choice for outdoor environments. It makes the whole hiking experience much more pleasant and safe.
Color Temperature Guide Table
| Color Temp | Light Color | Outdoor Performance | Verdict |
|---|---|---|---|
| 6000K+ | Cold White | High glare in fog | Not recommended |
| 4000K-5000K | Neutral White | Great detail, low glare | Highly Recommended |
| Under 3000K | Warm Yellow | Low penetration | Good for camp |
Waterproof Ratings You Should Care About (IPX4–IPX7)?
Are you worried about sudden rain ruining your gear? Water damage will destroy a cheap headlamp instantly. You must understand waterproof ratings to keep your light working.
Your headlamp needs at least an IPX4 rating7 to survive splashing water and light rain. If you want better protection, look for IPX5 to IPX7 ratings. These higher ratings ensure your headlamp will not fail due to heavy rain, morning dew, or thick moisture on the trail.
Night hiking always brings moisture. You will face dew, sweat, and unexpected rain. A headlamp without a good rubber seal will break very quickly. I have seen many good hikes ruined by a wet battery compartment. The letters IPX stand for water protection. The number after it tells you how strong the protection is. You do not need a diving light. But you do need protection against storms.
There is another important detail. Most sellers never mention this detail. If you live near the ocean, salt in the air will rust your headlamp. You need to ask the seller a question. You must ask if the product passes a salt spray test. At our factory, we always perform strict salt spray tests. This greatly extends the life of the headlamp for coastal users. You should always buy a headlamp with at least an IPX4 rating. An IPX6 rating is even better for heavy rain.
Waterproof Rating Table
| Rating | Protection Level | Is It Enough For Hiking? |
|---|---|---|
| IPX0-IPX3 | Almost none | No, avoid these |
| IPX4 | Splashing water | Yes, minimum requirement |
| IPX6 | Heavy rain jets | Very good |
| IPX7 | Submersion | Excellent |
User-Friendly Controls: The Importance of Easy Operation in the Dark?
Do you struggle to find small buttons in the dark? Taking off your gloves to change a light setting is frustrating. You need a headlamp with simple and clear controls.
A good headlamp must have large buttons that you can press easily without looking. You should be able to operate it while wearing thick gloves. It also needs a memory function to keep your last brightness setting and a system to switch modes very fast.
When you wear a headlamp on your head, you cannot see the buttons. You have to rely entirely on your fingers. If the buttons are too small or too flat, you will press the wrong thing. This is very annoying when you are tired. The button must have a loud click. This click tells you that you pressed it successfully.
A memory function is also highly important. If you turn the light off, it should turn back on at the exact same brightness level. You should not have to click through all the modes again. I always test new designs with thick winter gloves. If I cannot turn the light on, the design fails. Simple operation is the core of a good outdoor tool. Complex menus are terrible ideas for a hiking headlamp. Double-clicks are also very hard to do when your hands are cold. You just need big and simple buttons.
Control Feature Checklist Table
| Feature | Benefit | Why It Matters |
|---|---|---|
| Large Rubber Button | Easy to feel | Works with winter gloves |
| Memory Function | Saves time | Stops you from blinding yourself |
| Quick Switch | Changes modes fast | Helps adapt to terrain |
Benefits of a Red Light Mode for Night Hiking Safety?
Does white light ruin your night vision? Blinding your friends at the campsite is embarrassing. You must use a red light mode8 to protect your eyes and stay safe.
A red light mode is critical for night hiking. Red light protects your natural night vision. It does not blind your hiking partners or scare away wild animals. It is the perfect tool for reading maps or doing small tasks around your campsite in the dark.

Our eyes take about thirty minutes to adjust to the dark. One flash of bright white light ruins that adjustment instantly. This is why a red light is not just a toy. It is a necessary safety tool for all hikers. Red light has a long wavelength. It does not force your pupils to shrink. This means you can see the stars. You can see the dark trees. You can still see the map in your hands.
You must check one specific detail before you buy. The red light must have an independent switch. You should be able to turn the red light on directly. If you have to cycle through the bright white light to reach the red light, the design is useless. A good red light does not blind your friends. It does not scare away wild animals. It is perfect for reading maps or doing small tasks around your campsite.
Red Light Usage Table
| Situation | White Light Result | Red Light Result |
|---|---|---|
| Looking at friends | Blinds them | Comfortable for them |
| Watching wildlife | Scares them away | They ignore you |
| Reading a map | Glare hurts eyes | Clear and soft |
Weight and Balance: How Light Should a Headlamp Be?
Does your neck hurt after a long hike? A heavy headlamp pulls your head forward and causes serious pain. You need a lightweight headlamp to maintain good balance.
Your complete headlamp, including the battery, should weigh less than 120 to 150 grams. A light weight prevents neck pain. Modern manufacturing technology makes front-mounted headlamps very light, so you do not have to worry about the light pulling your head down.
 Click here to see more details about this headlamp.
Weight is a big issue for long hikes. Every extra gram feels heavier after a few hours. In the past, companies put the battery pack on the back of the head strap. They did this to balance the heavy light on the front. Many people still ask me for these split designs. I tell them it is no longer necessary.
In my personal experience, these split designs are bulky. They have extra wires. These wires can break easily. Modern single-unit headlamps are now incredibly light. The technology for plastics and batteries has improved greatly. A single headlamp on your forehead rarely causes balance issues anymore. You just need to keep the total weight under 150 grams. If you do this, your neck will feel fine all night. You will not feel any heavy pulling on your forehead. A light headlamp makes a huge difference on a tough trail.
Weight Category Table
| Weight Class | Typical Design | Comfort Level | Recommendation |
|---|---|---|---|
| Under 80g | Minimalist / Running | Very High | Good for short trips |
| 80g - 150g | Standard Single Unit | High | Best for hiking |
| Over 150g | Heavy Duty / Split | Low | Too heavy for trails |
Useful Extra Features That Enhance Your Night Hiking Experience?
Do you want more value from your gear? Basic lights just light up the path. You can get a much better experience by choosing headlamps with smart extra features.
You should look for a headlamp with a lock mode9 to stop accidental battery drain in your bag. I also highly recommend a detachable design that turns the headlamp into a small handheld flashlight. An ultra-low brightness mode10 is also great for saving power in your tent.
These extra features are not strict rules. You can hike without them. But they make your trip much easier. I always try to add these small details when we develop new products for our clients. A lock mode is a must-have for travel. If the button presses against a rock in your backpack, the light turns on. You arrive at the trail with a dead battery. A lock mode prevents this disaster completely.
The detachable feature is my absolute favorite. A headlamp that doubles as a handheld flashlight is extremely practical. You can remove it from the strap. You can hold it in your hand to look under rocks. You can hang it in your tent. It gives you two tools for the price of one. An ultra-low mode is also great. It uses very little power. You can use it to read a book inside your tent at night.
Bonus Features Table
| Feature | How It Works | Why I Love It |
|---|---|---|
| Lock Mode | Hold button to lock | Saves battery in bags |
| Detachable Body | Removes from strap | Becomes a handheld light |
| Ultra-low Mode | 5-10 lumen output | Perfect for reading in tents |
Final Checklist: The Core Specifications Every Night Hiking Headlamp Should Have?
Are you overwhelmed by all the choices? Reading too many specs can make you freeze. You just need a simple checklist to buy the perfect headlamp quickly and safely.
If you want to keep things simple, use this standard checklist. You need a stable brightness of 200 to 450 lumens, neutral white light6, and an IPX4 or higher waterproof rating. You also need a red light mode, a comfortable strap, and at least 4 hours of battery life.
I have given you a lot of information today. It is easy to forget the details when you stand in a store. It is also hard to remember everything when you browse online. I created a final checklist to help my clients make fast decisions. If a product passes this checklist, it is a good tool. You can trust it on the trail.
Do not compromise on these basic points. A cheap light without a red mode will fail you. A light without proper waterproofing will break in the rain. Quality matters when you are in the dark woods. You can use this simple list as your buying guide. You need stable brightness. You need neutral white light. You need good water resistance. You need a red light mode. You need a comfortable strap. If you follow these rules, you will buy a headlamp that lasts for many years.
Final Buying Checklist Table
| Specification | Target Value | Why It Is Non-Negotiable |
|---|---|---|
| Brightness | 200–450 Lumens | Ensures safe visibility |
| Color Temp | Neutral White | Reduces eye fatigue |
| Water Resistance | IPX4 Minimum | Survives rain and sweat |
| Battery Life | 4+ Hours | Prevents trail blackouts |
| Special Mode | Red Light | Protects night vision |
Conclusion
Choosing the right headlamp ensures your safety and comfort. Follow these simple guidelines on lumens, battery, and comfort to enjoy your night hiking adventures without any fear of the dark.
High visibility ensures you can see and be seen, enhancing safety during night hikes. ↩
A flood beam is essential for illuminating the ground, preventing trips and falls. ↩
Spot beams are crucial for seeing distant trail signs and markers clearly. ↩
A dual-power design offers flexibility and reliability during hikes, ensuring you never run out of light. ↩
A non-slip design ensures comfort and stability, preventing neck pain during long hikes. ↩
Neutral white light enhances visibility and reduces glare, making it safer for night hiking. ↩
An IPX4 rating indicates water resistance, crucial for outdoor use in wet conditions. ↩
A red light mode preserves night vision and is less disruptive to others around you. ↩
A lock mode prevents accidental activation, saving battery life during transport. ↩
An ultra-low mode conserves battery life, perfect for reading or close tasks in your tent. ↩